Monday 31 December 2012

Lacemaking

I received a basic lacemaking set for Christmas and have started playing!


Initially I thought that the plastic bobbins wouldn't be nice to work with but they are fine in your hands even if they're not very good quality.  A little niggle though is the  beads used for "spangling" the bobbins.  They are cheap and nasty plastic and do scratch.  It would have been helpful to have a little more wire to work with as there is very little excess to tie together and then thread in.  My bobbins are not the neatest but they'll do for now.

If you're doing this yourself points to remember are
- plastic bobbins are fine but you may want to file down the spare bits of plastic
- give yourself plenty of wire
- use wire cutters/pliers in bending/threading, it REALLY saves your thumbs
- treat yourself to some slightly nicer beads!!
- remember that the bobbins need to be done in pairs, NOT every one unique.  I laid my bobbins and beads out all nice and logically before starting and still managed to get it wrong and have to re-do half a dozen :(


Once you are all set up and get going the actual process of lacemaking isn't too difficult at all.  But before you get there you have to cut the thread and wind it on to the bobbins and put a special knot in to stop it unwinding.  It's quite time consuming and you do have to think while you're doing it.  I persevered with it but could quite easily have given up at this stage (particularly after the problems I had with the bobbins)


The lace I created looked quite nice and I was contemplating using it as a border for a flowery fabric collage picture.  But then the instructions got a bit complicated and I somehow ended up tying it into a not-very-neat circle.  I'm quite disappointed by this and acknowledge that I struggled to follow the instructions but am still pretty sure I did approximately what I was supposed to.


 I've given you a close-up photo to look at the detailing of the lace (now slightly ruched and stretched following the joining process) but I still think it can be used for something!

I'm going to carry on with the kit as there are several other patterns to try and I'm ?guessing, ?hoping all the different pieces will come together in some form of project.

OVERALL IMPRESSION
An OK kit for not a lot of money but some bits could do with upgrading.
Time consuming to set up but then fairly easy to actually carry out
Instructions for finishing off need a major re-haul and I shall be trawling the internet to find out how to do it properly

Sunday 23 December 2012

Miniature knitting

I've seen an image of a tiny felted owl sitting on a branch and knitting a scarf many times on pinterest and have tracked it down to an etsy seller called ScratchCraft


I decided that as I had time on my hands this week, as well as some crochet thread and cocktail sticks I'd give it a go and tried some mini knitting.  At that time I couldn't find the picture so made quite a few more stitches than this owl has!  That and it's just plain white thread


I also cut a long piece of thread and wound it up into a small ball and covered it in a thin layer of PVA glue to secure it.  The only problems I had were that the cocktail sticks are a bit pointy and the tips are prone to break (not being designed for knitting) but you could always switch one out when it gave up.


It doesn't matter too much that mine is a bigger scale as played around with Cow, making him pose for a photo

Tuesday 11 December 2012

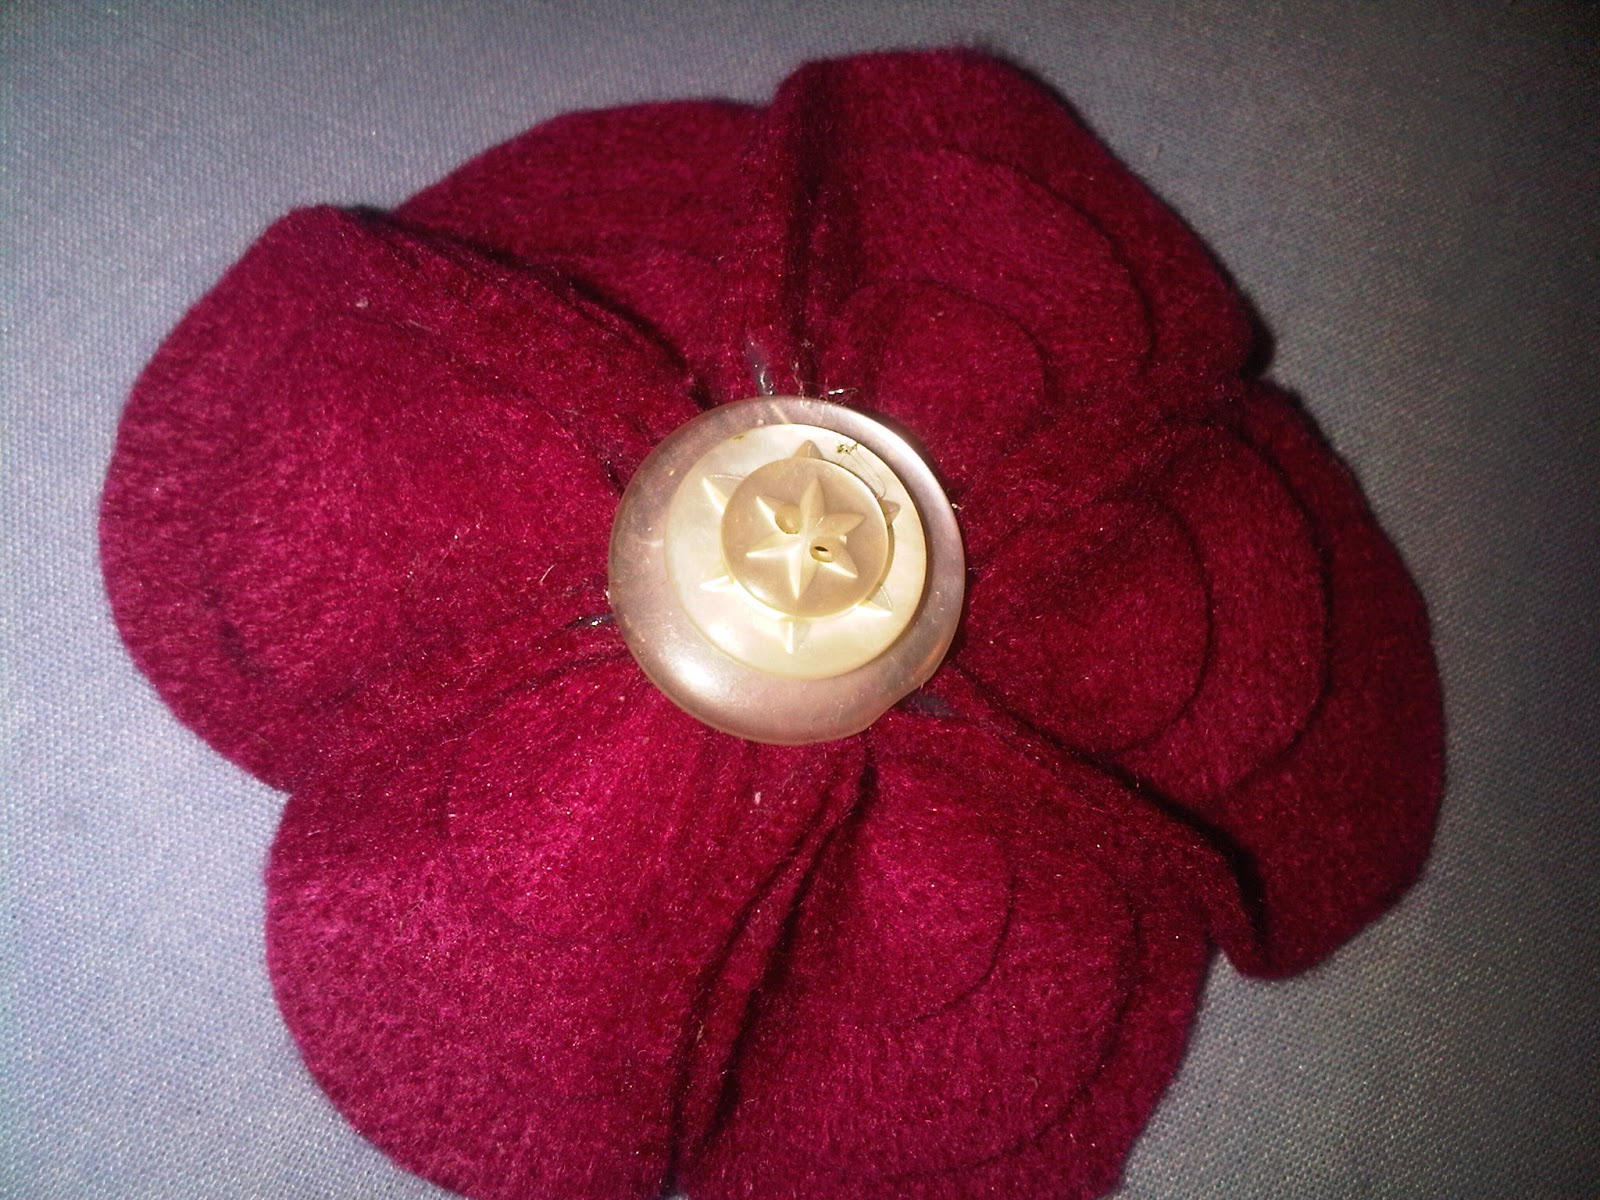
I saw a photo on a blog, someone had made a beautiful flower out of turquoise felt circles and I thought. "I can do that".


My picture isn't brilliant but hopefully you get the idea... I drew round three different sized circles and cut them out 6 times each:
               - a tub of lip balm
               - a £2 coin
               - a 5p coin
I layered each set of three (with the pencil lines on the bottom) and pinched at the bottom to get the shaping OK.  Then I glued them together with PVA and used a bulldog clip to secure them while they dried.  Unfortunately this doesn't work very well and takes for ever to dry so I suggest you use a glue gun instead.  I resorted to this but should have chosen the 'cold melt' rather than the 'hot melt' as you do need to do some judicious shaping and hot glue really is HOT, and burns...

Once you have all six petals complete you need to glue the edges of the petals together, start with a pair and then add anothet on round in a circle until you have to join them together.  You'll probably need to go back and add extra glue in where necessary.  Don't worry about there being too much glue because once it's cooled down you can go along and pick off the straggly bits, glue some stacked buttons into the centre and on the back another circle of felt (big enough to cover up all the messiness!!)

I have made another one (much better than the first) but that is already wrapped up as a Christmas present so all you get is another photo of the same one.


I'd quite like to start playing with felt so have kept all the scraps as I went along.  You could play around with having different coloured circles within the same flower (e.g. small circles yellow, medium orange, large red) but it can be difficult to get colours that tone well when you're in generic crafty shops.  An A4 sheet of felt will generally cost you 50p and there are often 3 for 2 offers.  I've made two flowers from my sheet and used a few snippets elsewhere.  I've got a fairly large chunk left to play with but not *quite* enough to make another flower.


A long long time coming...

I knew I hadn't been near the blog for a long time but didn't realise quite how long it had been!!  Since my last post I fell in love with the work in Hull and my amazing team who I was working with, I revisited my life list and added loads of new experiences, learnt to crochet, started a scrapbook for the year, moved to Reading for a Band 6 job, gained a (cuddly) llama and then went off sick.


Pain is never nice, constant pain is worse and when you feel like you want to rip your head off, even if yes that does mean you die, to stop it hurting then the situation needs a little external help...  Thankfully I am now on gabapentin (and several other new medications) which I can honestly say has changed my life and I have gone from counting down the minutes until my next dose of tramadol to not carrying anything stronger than ibuprofen in my bag! Such a huge change and one that I am so SO grateful for.


Over the next few weeks I'll try and catch the blog up with some of the craft projects that I've been doing.  They've had less of a miniature slant but I'm aiming to get back into that a bit more now too :)


Sunday 12 February 2012

Limited progress

I haven't really settled in properly yet and am realising how big the North/South divide is!! I've been quite tired recently as my job involves a LOT of driving and, particularly in this weather, it's been very demanding.  I've also been feeling quite low and uninterested in doing anything crafty so haven't bothered to blog.

Today is different....
- a large sheet of matboard has started being cut into pieces to make various furniture, I'm planning to follow this tutorial http://1inchminisbykris.blogspot.com/search/label/How%20to%20make%20a%20kitchen%20dresser%20with%20mat%20board

- I've started turning a box (approx 3inches x 2inches) into a teenytiny roombox and have put wallpaper in as well as the ceiling and started on the light fixture hanging from the ceiling - photos will follow.  I need to work out how to furnish it in the same scale which I'm expecting to be a bit of a challenge but there we go

All in all some much needed positivity - may it last longer than the end of the day.....

Monday 23 January 2012

Hull

I have moved North, all 240 miles North which is why it is having a capital letter and started a new job today with a community respiratory team.  Respiratory physiotherapy is definitely my preferred speciality and it's an amazing opportunity, if a *teensy* bit daunting.  In one day alone I have learnt more than I think I ever knew about inhalers and have sooooo much more depth and experience to gain!
As you might imagine crafting has taken a bit of a back seat to the rest of life but I did pack a much fuller box of supplies to bring with me this time and have bought a little pack of postcard size butterfly printed papers; very vintage (?for wallpapers).  The duck did not get knitted together, nor the cross-stitch mounted.  Mum has found another of my old cross-stitches, Tigger this time, and I bought a nice wooden frame for it but didn't quite get as far as mounting it... perhaps it will be finished as a surprise for me in a few months when I'm back down at my parents....
Ooh, I did also start doing a scrapbook page for Christmas 2011 and have got some stuff pre-prepared ready for experiences to happen and be documented this year; how organised is that?!?
Sorry for the lack of anything particularly interesting to talk about....although I have just remembered the miniature wooden toy train I started making, inspired by a tutorial in an old issue of 'Artisans in Miniature' magazine.  I can't remember which issue but you can find them all, here:  http://www.artisansinminiature.com/photo_2.html
Mine has progressed slightly since this photo was taken but that's all you're getting for now... And next time I will have the coin the other way up so you can tell it is a penny!!

Tuesday 10 January 2012

January

I'm planning to make a scrap book this year of all the 'firsts' I do and experiences I have.  So far there are a few things on my list for 2012 e.g. olympics, diamond jubilee, learn to crochet and I have a couple of things from yesterday as well

- first time I drove my boyfriend to catch the train to go to the airport to fly out to Germany for work (felt very 'wifey' and probably counts as a 'life tick')
- first time I have driven the M25
When the scrapbook pages have been made I'll post them up here.

I've also made a couple of miniature books but they are packed away in one of my boxes somewhere and still need to be glued together as well so you can't see them quite yet

I've been shopping in 'The Works' today with my christmas giftcard and found some really great books and can't wait to try all the different things out.  I've seen the 'one brush' flower painting before and this book has amazing instructions and I've also picked one up called 'New Ideas in Ribboncraft' by Susan Janes


Sunday 1 January 2012

Happy New Year

Having bought my boyfriend a cocktail kit for Christmas we decided to have an evening making cocktails to bring in the new year.  We spent a fair amount of the nectar points that we've collected over the year on the alcohol that was listed in the 'basic bar' - brandy, whiskey, rum and some really yummy blackberry and elderflower liqueurs.  You do need an awful lot of the 'extras' though - fruit juices, aromatic beers, dashes of this or that flavouring so we were very grateful to find a website that you could enter all your ingredients and it would suggest cocktails you could make!!  Wishing everyone a happy new year and more success in your endeavours than we had last night with our cocktails - we'll try again another time!